
My backyard was filled with scattered outdoor play equipment and I couldn’t take it anymore. A wooden swing set with several swings, a slide and a small rock climbing wall, a sand box randomly off to another side, and a new playhouse that we were about to makeover that didn’t have a place yet (full playhouse makeover details HERE). My husband decided we needed to make a custom backyard playground and it was such a great idea. He is extremely handy, so a backyard playground DIY was just another project for him. (Side note: you don’t have to be super handy to do this… it’s a fairly simple process.) All parks have dedicated dedicated play spaces, but residential playgrounds aren’t really a thing. We started looking up playground designs for backyards and playground ideas for backyard and realized that there’s no right way to do it. Ultimately we decided to see what worked best with our space and the items we planned to put in it and take it from there. Making the space work for us would be the best backyard playground for our home.
We began planning our at home playground… We selected an area to set up as a backyard play area, with backyard playground ground cover and all. My backyard is truly a multi-use space. We have a large pool, outdoor dining area, our yellow school bus turned vacation home (if you haven’t seen it, you can see lots of pictures of it HERE and the video tour of it HERE), our shed, our boat trailer, and all of our daughter’s outdoor toys. We’ve been able to make the most of our backyard by separating it into area and that’s exactly what we did with the playground. Beyond being practical, it looks great! I’ll walk you through the steps to create a custom backyard playground just like ours. Let me teach you how to build backyard playground.

STEP #1 – SPACE PLANNING
First you need to figure out the area you’ll need to make everything fit and mark it off. We used a string and 4 woods pieces of wood hammered into the ground on the 4 corners. It’s not only about making everything fit, you have to be mindful to leave space for playing. Don’t forget that the swing set requires extra space for climbing the stairs, going down the slide, etc. Whatever playground equipment or playground sets you currently have, think about how your child will play with it and leave the space needed for it.
If you don’t have a swing set yet, this is a very important factor to consider. Residential playground equipment come in so many sizes and variations. It’s truly important to create the space around it. I know it’s easy to get excited about finding the best backyard playsets, but a lot of them are huge. There’s so many playgrounds for backyards that it’s easy to gravitate to the coolest or prettiest ones. If space is a concern, I’d look into swing sets for small yards. Most of them have the main things you want without being oversized. This way you save space for other things in your kids outdoor playground.
After figuring out how to place our swing set, playground house and sand box (you can find our exact sandbox here), we were able to figure out how much space we needed for this design. For us this space was 16 feet by 20 feet. It allowed enough space to go down the slide, swing without crashing into something, etc. Remember to play with the placement as well, you might get better use of the space if you set it up a different way. We definitely moved it around several times before settling on this design.

STEP #2 – REMOVE THE GRASS
Now that you have your backyard playground plans in place, it’s time to really get to work. Next you need to remove all the grass in the space you plan to use. We left it marked so that my husband knew exactly what area to dig up. You want to get a level dirt area so you can put everything else on top of it. This is by far the most work. Don’t get discouraged. Once you get through this step, the rest is much easier. Having the grass removed and dirt leveled, truly helps in creating the best backyard playgrounds that’ll last. This playground we created is currently 4 years old and still looks great.
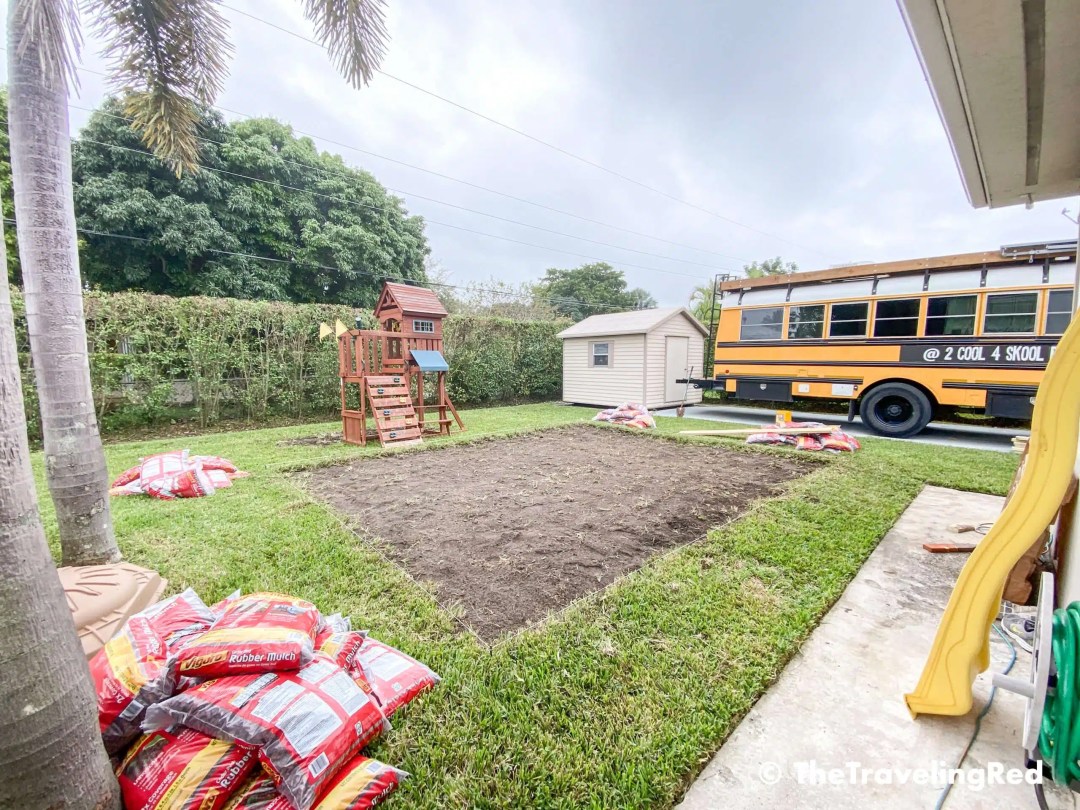
STEP #3 – ADD WOOD EDGING
Next up, you need to define the space properly. We finally removed the string marking off the space and added a wood edge. This will help keep the backyard playground flooring in place and separates it from the grass.

STEP #4 – ADD A PROTECTIVE BARRIER
One of those most important things in creating a backyard playground is getting the backyard playground surfaces right. This means having a level ground with the right ground covering. To keep the grass from growing through the mulch and dirt mixing into it, we added a protective barrier. It’s a landscape fabric that helps keep the weeds out and it’s a product you need to add. We just laid it out to cover the entire space and attached it to the wood on the edges. It hasn’t been 100% effective with the weeds, but it definitely keeps the mulch dirt-free. Occasionally we pull a few weeds, but overall the protective barrier has been effective in keeping them out.

STEP #5 – PLACE THE TOYS
Now it’s time to put things where they will go and make any minor adjust as needed. We first planned to put the sandbox away from the corner, but we decided that we rather have plenty of space for anyone going down the slide, so we adjusted it and moved the sandbox all the way to the corner. The playhouse wasn’t ready yet, so we added that after. However we did have the dimensions of it and measured for it when space planning.

STEP #6 – ADD MULCH
It’s finally time to add the backyard playground mulch! We went with rubber mulch in a red color so it would look pretty but it’s soft to walk on and so much better if a kid falls. We underestimated how much we would need and had to go back for more, so make sure you buy plenty! That picture below is when we ran out! We thought we had too much, but turns out, we weren’t even close.


STEP #7 – ENJOY IT!!
It took about a week of afternoons to complete it, but it was such a success! Our backyard looks so much prettier and my daughter loves her playground space. Residential playgrounds should definitely be more popular. They’re practical and beautiful. I guarantee your children will love it!
My only complaint is the sand play area backyard makes a mess. My daughter knows she has to keep the sand in the sandbox, but somehow we usually end up with sand around it. I definitely recommend keeping it to a corner so you don’t end up with sand everywhere.
Here’s some of my favorite memories of fun times playing outside in our newly renovated backyard.


18 Comments
What are the dimensions of the play area?!
It’s about 20 feet by 16 feet.
Where did you get the sand from?
Here it is! https://amzn.to/3n27Hu8
How many bags of mulch did you use
Over 30 bags
The rubber mulch doesn’t get too hot in the summer?
Not at all and we live in Miami, Florida where it’s extra hot!
Hello, awesome set up. I was wondering, what swing set do you have. I love it!
Thank you! I don’t think the exact one is available anymore. We bought it 5 years ago.
Can you give some tips on how you maintain your playground area? Especially during fall, winter and rain. How do you keep everything clean? Ever had an issue with bugs with stingers trying to make their nest? What about rain? How do you maintain the little house and the sandbox? How often do you need to replace the sand in the sandbox? I am thinking of building a similar playground in my backyard but concerned about maintenance part.
We live in Miami, Florida so we don’t really have fall and winter weather. However, we definitely have lots of rain. The sandbox I always keep covered, so we’ve never had an issue and have never had to replace the sand. The house definitely has wear and tear over the years, but there isn’t much you can do about it. After about 2 years I touched up the paint a bit. That’s it.
Can I get a list of materials for when you made border of play area please
The border is just wood
Hi! Do you have a link for the landscape fabric you used?
No, my husband found it at the local hardware store
How many bags of mulch did you end up buying? Or how much total in mulch?!
If I remember correctly, it was about 30-40 bags